Introduction
Congratulations with the purchase of the SRC Receiver!
Since the receiver is a versatile device, you will need to take some time to get to know all possibilities.
If you want to be helped at your place or have difficulty with reading English, we do offer on-site help.
Read more about it here: Support, who can help?
Be sure to read the FAQ too, it will save you time if you encounter a problem.
Placing the SRC Receiver
Boxed products bought in world:
The product you received is 'boxed'. Rez the box by dragging it from your inventory onto an empty spot in world.
Left click the box to open it's content and do copy all to inventory. Take care not do this procedure with the actual receiver, because then you will end up having the scripts inside your inventory and a not functioning receiver.
Bought via the marketplace (or after unpacking the box)
You will now have a folder in your inventory called for example: [SHX- SHOUTcast Receiver - SRC-F200]
Rez the Receiver (named for example: SHX-SRC-F200) by dragging it from your inventory onto an empty spot in world.
Please do not deed the board!
To prevent theft, unwanted modifications and other problems, it will disable itself when you deed it.Power off the board before taking or returning it!
The board automatically renames itself when powered on to the configured clubname or logged in DJ, so you might have trouble finding it back in your inventory later on. Power it off to have it retain it's original name before taking it back into your inventory.
First Use
Make sure you are facing the front; The frontside is fully black or white. The backside will show our logo.
Please STAND CLOSE to the receiver, within 10 meter, so you can hear whispered messages.

image 1
Changing Music on your parcel - MCD Installation
The first time you place the receiver, it will tell you both in chat and in a dialog window that to be able to change the music on the parcel, you need to rez the MCD (see image 2) via the menu: [Options] - Rez MCD. In short, you have to make sure that the group the Receiver is set to, is the same as the group that owns the parcel (if it's group owned land), rez the MCD via the menu and deed the MCD (when needed). A more detailed installation guide for the MCD can be found here: MCD manual
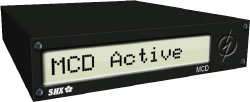 image 2
When you successfully have installed the MCD, you can test it out by changing a radio station with the menu, the music on your parcel should change.
Important Notes:
- You can rez a MCD on any parcel in the region to let the Receiver change the music everywhere in the region.
- The MCD is a very powerful device and will work in every situation possible, it will even allow you to change music on any parcel in other regions in Second Life.
- Change the MCD description to set an exception to the group <-> group rule to make the MCD work on parcels that have another owner then the parcel where the Receiver is placed. (see the MCD manual)
DJ Access
There are three methods to let DJ's login to the receiver:
- HUD login: With a SRC receiver compatible HUD (separate available). No notecards are needed inside the Receiver.
- Guest DJs: With the Quick DJ button: This is meant for guest Djs that do not often perform at your venue.
- House DJs: By placing one or two notecards per DJ inside the Receiver. Meant for DJs that perform often at your venue.
Hud Login:
The first method is the easiest and will allow managers to give access to DJs when the owner of the Receiver is not online, but will require that the DJ has purchased and configured a DJ HUD. If configured in the general config, DJs can login themselves without needing the Manager or Owner around.
Guest DJs:
This method can be activated by a manager or the owner only.
It only involves searching a nearby avatar (within 50 meter of the board), entering the stream URL and the streamtype to get a DJ going.
Nothing is stored, since it's meant for one-time (guest) DJs or events.
House DJs:
The Third method involves making two cards per DJ: A DJ card and a Stream card.
When configured, the DJs can login themselves, without the need of the owner or a manager to be around.
The DJ card contains information that can be displayed on the board, images, effects and a link to the to use Streamcard. The Streamcard contains the stream URL and some other stream related options. To make these cards you can make a copy of the examples inside, rename them and modify. Or you can use the Card wizard here: DJ Card Wizard. More information about the DJ cards can be found here: How to add DJ & Stream cards
CLICK HERE FOR A VIDEO HOW TO MAKE CARDS USING THE WIZARD
NOTECARD WIZARD (UK): http://www.shxonline.com/src/ncwiz/
DJ NC ASSISTENT (Deutsch): http://www.shxonline.com/src/djnc/
Cartes pré remplie pour DJ (FR): http://www.shxonline.com/src/djcartes/
DJ Kaarten Wizard (NL): http://www.shxonline.com/src/djkaarten/
Card backup/restore / How to let managers add cards
The receivers have a build in card-tray that can be used to make a backup of cards, share them with others or give a card-tray to your manager so the manager has a way to add cards to the receiver when you as owner are not around.
More information about this feature can be found here: Card-Trays
Giving Managers & Group Access
To set the access to the Receiver, touch the Receiver to get the menu and press [Access].
You then will see the menu as displayed at image 3. Choose one of the available options. The chosen option will be marked with a star *.
Group will be the group that the Receiver currently is set too. DJ's are the DJ's that have been added to the board with notecards as described in the previous section. Managers will have access in all cases, regardless of the setting in the Access menu.

image 3
To add managers, you have to edit the notecard: SHX-SCRC-!Config, which can be found in the contents of your Receiver. (see image 5)
Just add names to the card as described in the card itself.
Note that you have to turn the receiver Off and On again to apply any changes to the Config notecard.
To get to the contents: Rightclick the Receiver (Image 4) and click EDIT, then goto the tab CONTENTS (Image 5)
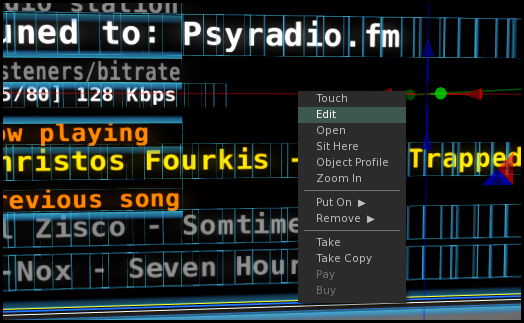 Image 4

image 5
Change Clubname / Config
Initially you will want to change the clubname, which can be found in the general config. The general config card is in the contents of the Receiver and is called: SHX-SCRC-!Config.
Change it to your clubname, save the card and power the Receiver off and on again.
Additionally you might want to change other options.
Changing the Background Image
In the contents of your Receiver you can find two textures named: image-on and: image-off.
You can replace them with a custom texture of your own, by deleting these textures and dropping your own with the exact same names: image-on and image-off.
Of course the names speak for themselves, they are displayed on the backpanel when the Receiver if off, or on.
Changing the Top Text and Logo
To make changes in the display of the top line text, where as example now is displayed the time in Holland, you have to edit the notecard !Text_Main. (see image 5)
The second line of text is reserved for information of DJ's, which are fed by the DJ cards (prefixed with a @). However there are some exceptions:
Usage of cards to feed the second line display:
- In the case that you select a radio station, the card: !Text_Radio will be used.
- When you select a stream via the [Streams] menu, the card: !Text_Stream is used.
- Pressing the <No Stream> button will use the: !Text_NoStream card.
- Logging in a DJ with the 'Login as DJ' button will use the appropriate @DJNAME card.
All the above mentioned cards make use of our own interpreter, which makes it easy for you to display effects, text and images, without the need of knowledge of Second Life scripting. More information about the commands available & the image sizes can be found here: SHX Script commands
After changing any of the above described cards, you can reload them with the [Manager] menu. Just click the appropriate button in the manager submenu to reload the modified card. Use the Rez Default menu item in menu: [Options] - [Cards] to rez a backup of all default cards if you want to revert to the default state.
Changing the Time at the Top Text
Open the card !Text_main as show in image 5, by doubleclicking the file in the contents of the board.
Scroll down the script, until you see:centertext;Time in Holland %TIME,1,0,1%
To change it for instance to EST (Eastern Standard Time), which is -5 GMT, during summertime:centertext;Current EST Time: %TIME,-5,1,0%
Using Central Standard Time (CST), during summer, it would be:centertext;Time in Houston, Texas: %TIME,-6,1,0%
The time in Tokio, during winter, in 24 hour format:centertext;Current time in Tokio: %TIME,9,0,1%
The syntax for the time placeholder, is:%TIME,<GMT offset>,<DST on/off>,<24Hr,12Hr display>%
GMT offset => The offset from GMT (or UTC). Do not use + for positive numbers, just enter the digit. e.g: %TIME,9,1,0%
DST (Daylight Saving Time), or summertime. => Use 1 for on, 0 for off.
24Hr,12Hr display => Use 1 for 24 hour time, 0 for 12 hour time with am/pm.
Changing the Radiolist
Inside the contents of the Receiver you will find the notecard: Radiolist. This card is used to feed the [Radio] menu with stations you can select.
Just edit the Radiolist notecard and put in your favourite stations. Note that the contained Radiolist is merely an example. We are not affiliated with any of the stations that are listed.
The format used is:
STREAMMETHOD|STATIONNAME|GENRE|URL|IMAGEUUID|SID
Example:
SC|Psyradio.fm|Progressive|http://81.88.36.42:8010/|744a8cf2-c3a3-119b-1844-402d42f81b04
- STREAMMETHOD: Can be SC, S2 or IC. SC = Shoutcast1, S2 = Shoutcast2, IC = Icecast (or Nicecast)
- STATIONNAME: Any name you want to see in the menu, but do not use more then 24 characters.
- GENRE: The music genre (for your own reference)
- IMAGEUUID: This is an optional parameter. If you place an image uuid, it will be displayed whenever you select the station. You can get an image UUID by rightclicking a texture in your inventory and selecting COPY ASSET UUID. Then pressing CTRL-V in the notecard will paste the UUID.
- SID: This is an optional parameter. It is used for SHOUTcast2 streams only and is the stream number. If not specified, it will default to stream #1
To reload the modified Radiolist without restarting the Receiver, just open the [Managers] menu and click Radiolist.
If you want to search radio stations online, we have a several remote controls available for the receiver that are able to search online on just a keyword. See the addon section below.
Click here for more info about radiostations.
Group notifications and interaction
The SRC Receiver is the first device in Second Life that automatically can send group messages and notifications, or even have people in group chat interact with the device. This however requires a 3rd party service: SmartBots This is an extra feature, it's up to you to decide if you want to make use of this.
This feature makes it possible to automatically send a group message and/or notice as soon as a DJ logs in, displaying the DJ name, genre, county of origin, place where people need to go and any information you deem necessary. You can modify the messages by editing the general config.
It also makes it possible that people type a specific command in group chat to automatically retrieve a landmark to your place. (Note that you need to drop a landmark in the contents of the board)
Situations where for example you run a 24/7 club, where DJs freely come and go to play, it is convenient to have the SRC receiver automatically send out a group messages and/or a notice to inform people when a DJ is playing live.
To fully use the group message feature, you need to rent an Adminbot Professional from SmartBots.
Once you successfully have set up the bot, you are able to get a special password by clicking on the "Edit group settings" link on the bot at the SmartBots website. It is imperative that you use this password, together with the groupname and turning the SmartBots feature on in the general config: SHX-SCRC-!Config.
For a better overview of available placeholders in the message and help to make up the configuration.
Track Announcements in local Chat
Default this function is turned off. Touch the Receiver for the menu, choose [Options] and then [Announce] to change it to another setting. Whisper is 10 meter range, Say is 20 meter range and Shout is 100 meter range.
Use this function with great care. Not everyone is charmed with text in chat, specially not your neighbour when the range reaches their parcel.
To change the prefixed texts that appear in local chat, take a look in the general config card: SHX-SCRC-!Config inside the receiver.
Synchronisation mode
As of version 3.4, all SRC receivers transmit changes to other boards within the same region that are on the same SRC channel.
For instance, when you have 3 boards, and a DJ logs in on any of them, it will automatically login on the other boards. Regardless which one is used.
Note that for DJ login via the button Login as DJ, it requires that the other boards have the same cards inside.
To omit synchronisation when you're using more than 1 board, use other SRC channels.
Automatic switching
A function is built in that will automatically switch to the first radiostation set in the Radiolist, if a stream (from either a DJ or radiostation) can not be reached for 10 consecutive times.
This behaviour can be changed with the setting: AUTOREVERT: ON / OFF in the SHX-SCRC-!Config (generic config) card inside the receiver.
Note that it is possible that a stream will produce music, but still activate the switch because of errors. This is because the songdata is fetched in a different way than how you hear the music. Or it could be that you had selected the wrong streamtype.
More documentation
There is more to the SRC Receiver then described in this manual.
- In the support section you can find most asked questions.
- To see what each menu function of the Receiver does then please read this article: SRC Menu functions
- To get more insight about streaming in general, read the Music Streaming articles
- How do I get Support, is also covered if what you seek can not be found on this website
- If you lost your Receiver, please read this procedure: Lost Products
- Read the FAQ for frequent questions and answers.
- To check if your product is up to date, click here: Versions and Updates
AVAILABLE ADDONS IN THE SHX STORE:
Display Album Art
Separate available boards are available that can automatically display album art. Fed via the web (amazon.com) and thus always up to date.
DJ Tipjars
The SRC Receiver is able to automatically activate a tipjar when a DJ logs in with the separate available CTS Server.
Remote Controls
Several remote controls are available, where a selection are able to search Radio Stations online and feed directly to your SRC Receiver.
Visit our shop to see the available models, which are separate available.
DJ Lineup board
To make schedules for DJs and display them to visitors, we offer a DJ Lineup board. This board works together with your SRC Receiver.
DJ HUDS
Several DJ Huds are available, which makes it easier to login at places where a SRC receiver is available, inform fellow DJs of your turnaround time (advanced hud), control a SHX booth and more.
SHX Booth
The SHX booth we sell make use of the DJ list and manager list contained in your SRC Receiver to give access to DJs and managers. It also works together with the Advanced DJ Huds.